

Kimono Accessories Guide: From First Kitsuke to Formal Tea Ceremony
Introduction: Why Kimono Accessories Matter in Kimono Dressing
Learning to wear a kimono is less about having the "right" body type and more about having the right accessories. The Japanese kimono is a traditional Japanese garment with a history stretching back centuries-the first kimono-like garments appeared in Japan around 300 CE, and by the Muromachi period (1336–1573 CE), the kosode had become standard outerwear. During the Edo period (1603–1867 CE), kimono styles flourished among merchants, and the modern kimono canon was formalized after World War II. Throughout that evolution, accessories have always been the tools that transform a flat rectangle of fabric into a living, breathing outfit.
If you're new to kimono culture, you'll likely start with a casual yukata-an unlined cotton summer robe with a simpler accessory set-before transitioning to a formal kimono with its full layering system. That progression is natural and recommended. A kimono's accessories help define the outfit's formality and season, and this kimono accessories guide will walk you through every piece you need, from the hidden skin layer to the final decorative cord on your obi.
What you will learn:
-
How base layers (hadajuban, nagajuban, hosei padding) create the iconic cylindrical silhouette
-
Why structural tools like koshihimo, datejime, and the Korin belt are the unsung heroes of proper dressing
-
How to choose the right obi and finishing accessories (obiage, obijime, obidome)
-
Which footwear and socks complete your kimono ensemble
-
The key differences between casual yukata and formal kimono accessory requirements
Essential Checklist: What You Need to Wear a Kimono
Before diving into the details, here's a scannable checklist of core accessories grouped by function. Items marked with ★ are essential for beginners; others are nice-to-have as you progress.
Base Layers:
-
★ Hadajuban (skin-layer undergarment) or suitable substitute
-
★ Nagajuban (under kimono with collar)
-
Hosei padding (towels or dedicated pads)
Structural Accessories:
-
★ Koshihimo × 3 (waist ties)
-
★ Datejime × 1–2 (smoothing belts)
-
★ Korin belt × 1 (collar clip belt)
-
Kimono clips (for solo dressing)
Obi Tools:
-
★ Obi (hanhaba obi for beginners)
-
★ Obi-ita (obi board)
-
Obi makura (obi pillow-needed for taiko knots)
-
Obiage (obi scarf)
-
Obijime (decorative cord)
-
Obidome (optional decorative clasp)
Footwear:
-
★ Tabi socks
-
★ Zori (formal sandals) or geta (casual wooden clogs)
Core accessories include obi, obijime, obidome, footwear, and tabi-these are the pieces that complete any kimono ensemble. Note that men's kimono kits differ slightly (less padding, no obiage or obi makura for most styles), but structural accessories like koshihimo and obi-ita are shared across both.
Base Layer 1: Hadajuban (Skin-Layer Undergarment)
The hadajuban is your first line of defense between your body and the layers of silk and fabric above it.
-
What it is: A thin, lightweight fabric undergarment worn directly over modern underwear. Hadajuban is worn beneath the kimono to protect it from body oils and sweat, keeping your more expensive layers clean and extending their lifespan.
-
Design options: One-piece robe style or two-piece-a top called hanjuban paired with a susoyoke, which is a petticoat worn under the kimono for smoothness across the lower body. Both versions feature simple tube sleeves and no visible collar.
-
Fabric and seasonality: Cotton or cotton-blend in summer for breathability; slightly thicker cotton or mixed fibers in cooler months for gentle insulation. Colors are almost always white or very subtle shades.
-
Modern substitutes: For casual practice, a smooth camisole or light T-shirt with a slip or leggings can work. However, these substitutes don't replicate the flattening and smooth surface that a proper hadajuban provides, so your silhouette may suffer-especially around the collar and under the sleeves.
-
Why it matters: Without a hadajuban, sweat and oils transfer directly to the nagajuban or outer garment, causing discoloration and degradation of the main fabric over time.
Base Layer 2: Nagajuban – The Under Kimono That Shapes Your Silhouette
The nagajuban is a lightweight undergarment worn under the kimono but over the hadajuban, and it plays a starring role in kimono dressing.
-
Definition: A full-length juban (under kimono) cut in the same T-shape as the outer garment, with its own collar where a decorative han-eri can be sewn. The nagajuban is worn over the hadajuban and under the kimono to smooth the drape of outer layers.
-
Silhouette builder: The nagajuban creates the smooth, cylindrical silhouette that is iconic in women's kimono styling. It prevents the outer garment from clinging, bunching, or shifting during wear.
-
Collar visibility: The nagajuban collar is sometimes visible and can add an aesthetic touch-a glimpse of the inner collar (han-eri) at the neck adds depth and color to your outfit. For formal occasions, white han-eri is standard; for casual wear, subtle patterns or colors are acceptable.
-
Fabric choices: Washable polyester is ideal for beginners-affordable, easy to clean, and forgiving during practice. Silk nagajuban are reserved for formal or traditional wear.
-
Fit guidance: The hem should hover just above the ankles so it doesn't peek below the outer kimono. The wrap across the shoulders should be comfortable, not tight. The collars of the nagajuban and kimono must align cleanly-misalignment causes visible puckering.
-
When to skip it: Beginners wearing a yukata usually omit the nagajuban entirely. But for a formal Japanese kimono or tea ceremony, it's standard and expected.
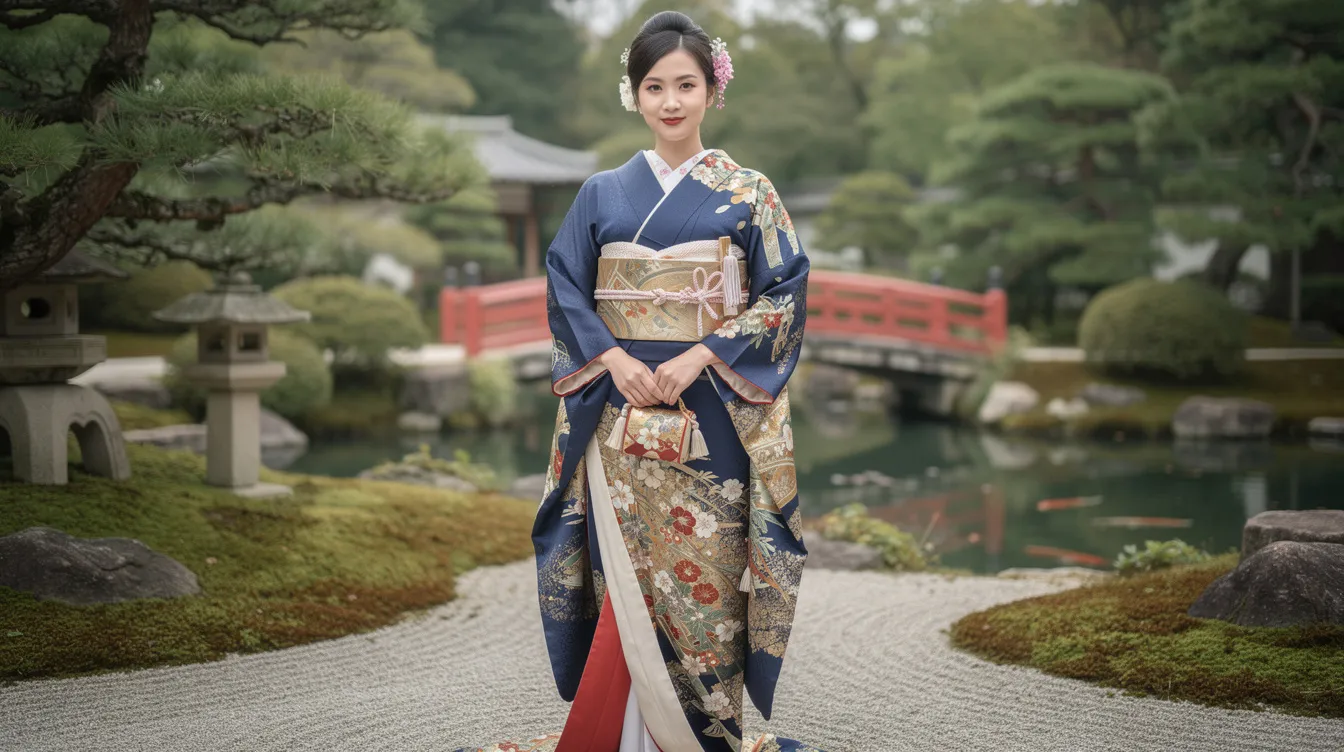
Creating the Cylindrical Silhouette: Hosei (Padding)
Hosei refers to the padding and body-shaping step that many newcomers don't expect but quickly appreciate.
-
What it is: Hosei are small pads or folded towels used to smooth the body line-evening out the waist, filling the lower back hollow, and softening the bust line to achieve a straight, columnar profile.
-
Why it exists: Traditional women's kimono aesthetics favor a smooth cylinder over a highly defined waist. The garment is designed to drape from the shoulders in clean lines, and curves disrupt that drape.
-
Beginner methods: Fold a standard cotton face towel lengthwise, wrap it around the waist, and secure it with a koshihimo. For deeper back hollows, a second small towel tucked at the lower back helps. Dedicated foam padding belts are also available.
-
Seasonal adjustments: In hot, humid summers, heavy hosei is reduced to avoid overheating. Minimal padding-a single thin towel at the waist-may still be needed for proper fabric drape.
-
Men's kimono: Hosei is largely optional for men, whose kimono silhouette is naturally straighter and less dependent on body shaping.
Practical placement tips:
-
Waist dips: wrap a folded towel snugly around the natural waist
-
Back hollow: tuck a small pad into the lower back curve
-
Under-bust: a thin layer can prevent the obi from riding up on a high bust
Koshihimo: The Waist Ties That Do the Heavy Lifting
Koshihimo are thin fabric ties used to secure the kimono, and they do more structural work than any other single accessory.
-
What they are: Narrow ties (roughly 2 meters long, 4–5 cm wide) made of cotton, polyester, or silk. Koshihimo are ties used to secure the nagajuban and kimono layers at multiple points during donning.
-
Material recommendation: Slightly grippy cotton is easiest for beginners-it holds knots without slipping. Polyester ties can be slick; silk ties are traditional but pricier.
-
How many you need: A beginner should own at least 3 koshihimo, with a spare recommended. One secures the nagajuban at the chest, one holds the outer kimono at the waist/hips (creating the ohashori fold that manages excess length), and one adjusts the collar and shoulders.
-
Where each tie goes:
-
Under-bust area: secures the nagajuban collar and wrap
-
Low waist/hips: holds the kimono hem and creates the tuck of excess fabric
-
Chest/collar level: anchors the collar overlap and manages excess fabric in the upper body
-
-
Tension tips: Tie firmly enough that the garment stays in place, but not so tight that you can't breathe comfortably after sitting. "Firm but comfortable" is the rule-discomfort means it's too tight, and a slip means it's too loose.
Datejime: Smoothing Belts That Tidy Your Layers
The datejime is a smoothing belt worn under the obi for support, and it bridges the gap between messy koshihimo knots and a polished final look.
-
What it is: A flat, wide belt (wider than koshihimo but narrower than the obi) worn over koshihimo to compress bumps, smooth the fabric surface, and keep collars locked in place.
-
Two main uses: One datejime goes over the nagajuban to stabilize its collar and wrap. A second goes over the outer kimono at the waist, directly beneath the obi, to prepare a flat foundation.
-
Material options: Stiff cotton or synthetic tie-on styles are traditional. Modern versions with hook-and-loop (Velcro) closures or soft foam cores are easier for beginners and faster to adjust.
-
Why it matters: Without a datejime, collars can gap open, the ohashori can droop, and the obi tends to slide down over koshihimo knots throughout the day-a problem called kitsuke-kuzure (着崩れ), or outfit collapse.
-
Beginner advice: Own at least one; two is ideal. The belt should sit flat and non-bulky, completely hidden beneath the obi. Some schools treat datejime as optional, but for self-dressing beginners, it makes a dramatic difference in collar and waist stability.
Korin Belt: Beginner-Friendly Helper for Neat Collars
The Korin belt is one of those modern innovations that traditionalists debate but beginners love.
-
What it is: An elastic band with padded clips at each end, designed to hold the inner collar and outer collar of the kimono in a clean, symmetrical V-shape.
-
How it works: Clip one end to the inner collar on one side, wrap the elastic around the back, and clip the other end to the outer collar on the opposite side. This keeps the left side firmly wrapped over the right side, maintaining the overlap that the Yōrō legal code mandated as left-over-right robe closures in 718 CE.
-
Why it's popular: For modern solo dressers, a Korin belt dramatically reduces the frustration of shifting collars. It's particularly helpful for maintaining a clean neckline at formal events like a tea ceremony or wedding.
-
Traditionalist perspective: Some kimono schools prefer only fabric ties, viewing clips as shortcuts. But for self-learners, the Korin belt is a practical tool that builds confidence.
-
Shopping tips: One is enough. Look for soft, fabric-padded clips that won't damage silk and elastic with lasting tension. Check the elastic annually-it degrades over time.
Obi-Ita: The Obi Board That Keeps Your Obi Smooth
The obi-ita is a small piece of equipment that makes a surprisingly big difference.
-
What it is: A thin, rigid or semi-rigid board placed under or inside the front of the obi to keep the sash flat, smooth, and wrinkle-free.
-
Why you need one: Without an obi-ita, even a beautiful obi can sag, crease, or bulge over the koshihimo knots hidden beneath. This is especially true for softer obi like hanhaba obi and Nagoya obi.
-
Common styles:
-
Removable board: tucked behind the obi after wrapping
-
Belt-type: worn before wrapping the obi, with a built-in elastic band that holds it in place
-
-
Size and stiffness: Match the board width to your obi style. A board around 13–14 cm wide suits most hanhaba obi; wider boards (~25 cm) work for Nagoya and fukuro obi fronts.
-
Casual vs. polished: For informal yukata outfits, some people skip the obi-ita. But using one instantly elevates even a casual outfit, giving you that smooth, magazine-quality obi front that separates practiced dressers from beginners.
Obi Makura: The Obi Pillow Supporting Your Knot
The obi makura is what gives formal obi knots their signature lifted, structured shape.
-
What it is: A small padded pillow-crescent or rectangular-used to prop up and shape the obi knot (musubi), especially the taiko and nijūdaiko styles seen in semi-formal and formal dress.
-
When it's required: Essential for most Nagoya obi and fukuro obi musubi. For simple bow knots with a hanhaba obi, you can usually skip it.
-
How it works: The obi makura sits at the back, nestled under the upper fold of the obi. Long fabric ties extend from each side, wrapping around the body and secured under the obi. The obiage (scarf) drapes over the pillow to hide it from view.
-
Effect on silhouette: A well-placed obi makura creates the lifted, balanced back view that characterizes proper kimono styling-the "drum" shape of the otaiko knot.
-
Beginner recommendation: Choose a medium-firm, standard-sized makura suitable for common taiko knots. Avoid overly large or stiff versions until you're comfortable with basic tying.
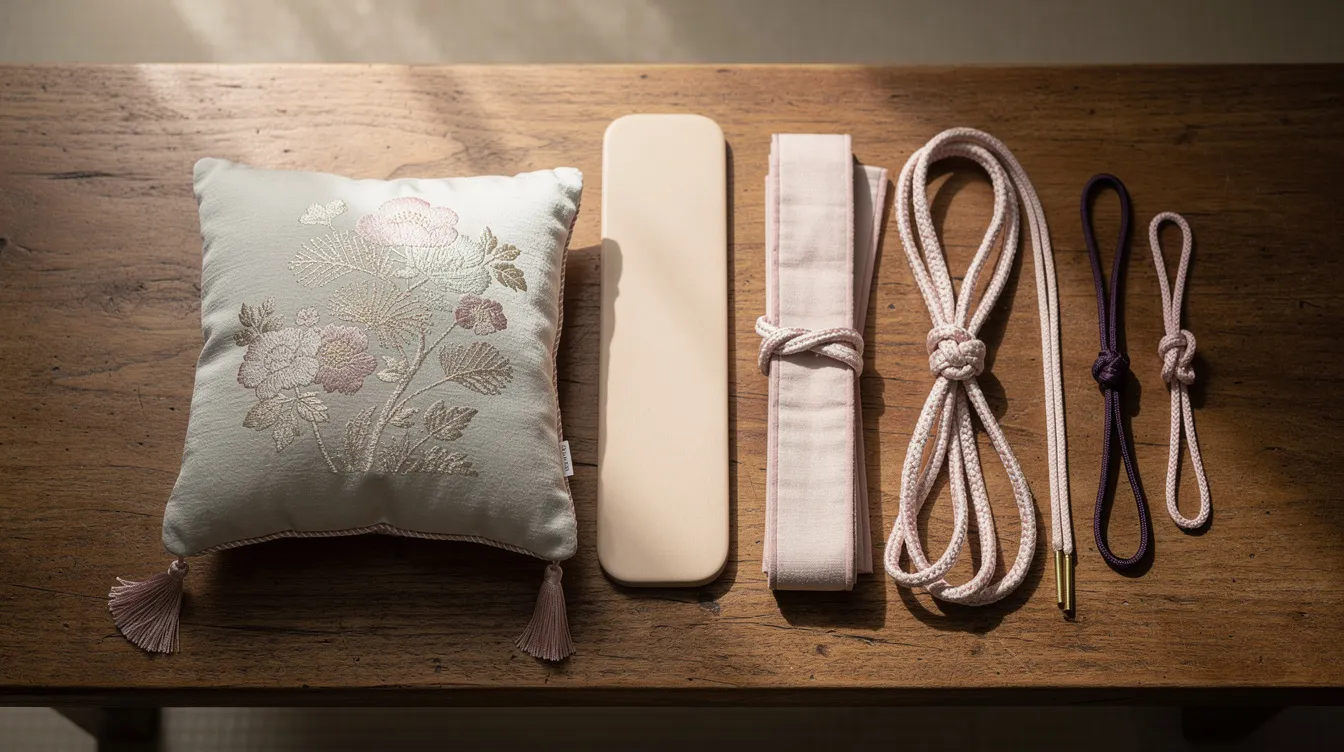
Obi Basics: Choosing the Right Obi for Beginners
The obi is a wide decorative sash wrapped around the waist, and choosing the right one is one of the most important decisions in kimono dressing. Here's a practical overview of the main women's obi types:
-
Hanhaba obi – The easiest starting point for beginners. This narrow obi is approximately 15 cm wide and lightweight, commonly paired with yukata and casual komon kimono. It doesn't require an obi makura or obiage, making tying far simpler. Many pre-tied options exist.
-
Nagoya obi – The typical semi-formal choice, roughly 30 cm wide at the back and pre-narrowed in the wrap section. Best for wearers comfortable with the otaiko knot and using an obi makura. Suitable for visiting-wear (hōmongi) and patterned kimono.
-
Fukuro obi – A formal, full-width obi (~30 cm, lengths around 4–4.5 m) with patterned front and often simpler back. Used for formal occasions such as weddings, graduations, and furisode styling for unmarried women.
-
Maru obi – The most formal type, double-sided pattern, heavy, and rare. Maru obi is reserved for bridal wear and the highest-formality ceremonies. Most beginners won't encounter one for years.
Beginner path: Start with a hanhaba obi and practice simple bunko musubi (bow) knots. Once comfortable, move to Nagoya obi with taiko knots. Save fukuro obi and maru obi for later, after you've mastered basic kimono dressing and the required supporting accessories.
Obiage: The Silk Sash That Secures and Decorates
Obiage is a decorative silk sash tucked over the obi knot, and it's one of the most visible accent pieces in women's kimono styling.
-
What it is: A soft silk or synthetic scarf draped over the obi makura, then tucked neatly under the top edge of the obi. It serves both a structural and decorative role.
-
Practical function: Obiage stabilizes the obi makura ties and prevents the knot from drooping during a busy day of wear. Without it, the pillow's ties can work loose and the musubi can sag.
-
Decorative impact: The obi age adds a visible band of color above the obi at the waist. Shibori-dyed, solid, or gradient designs are all common. Accessories should harmonize with the overall color scheme of the kimono-younger wearers often choose bright colours, while older or formal wearers prefer softer tones.
-
Tie styles: A simple tuck (folded and tucked into the obi top) is standard for formal styles. A small bow or knot visible above the obi is more casual and playful.
-
Starter advice: Begin with one or two versatile shades-soft pink, pale green, or ivory-that coordinate with multiple obi and kimono combinations.
Obijime: Decorative Cord and Obidome as the Final Accent
The obijime is a decorative cord that secures the obi in place, and it's the last structural piece you tie before your outfit is complete.
-
Structural role: The obi jime passes through the center of the obi musubi (knot), locks it firmly, and wraps around to tie at the front. Without it, many obi knots would gradually loosen and shift.
-
Decorative role: As a visible line of color across the obi front, obijime links the colors in your kimono outfit. Round, thick cords with metallic or gold/silver threads suit formal events; flat, matte, woven cotton or silk cords work for everyday style.
-
Obidome: An obidome is a small decorative jewel or slide mounted onto the obijime, adding personality without overwhelming the kimono. Use sparingly in formal settings-tea ceremony, for instance, favors restraint.
-
Sanbun-himo: A sanbun-himo is a set of three thin cords (or a layered decorative cord) sometimes used in modern styling to create colorful, layered looks. It relates to contemporary obijime styling and is purely decorative rather than structural.
-
Beginner advice: Start with one simple, versatile obijime in a muted or complementary color. Add an optional small obidome that works across seasons once you're comfortable with the tying technique.
Tabi Socks: Foundation of Traditional Footwear
Tabi socks are traditional split-toe socks worn with kimono, and they're one of the first things you put on during the dressing process.
-
What they are: Ankle-height socks with a split between the big toe and other toes, allowing them to fit into the thong strap of traditional sandals.
-
Materials and closures: Cotton or cotton-blend for breathability; traditional kohaze (small metal hooks) closures along the ankle, or modern elastic pull-on designs for convenience.
-
Formality rules: White tabi are mandatory for formal occasions and ceremonies, including tea ceremony, weddings, and graduations. Patterned or colored tabi are acceptable with casual kimono or yukata for a playful touch.
-
Dressing order: Put on tabi socks before dressing in a kimono. Many experienced dressers recommend this because bending down to put on tabi after the kimono is tied can disturb carefully arranged layers.
-
Fit tips: Snug but not tight at the ankle. The heel should sit properly in the sock with no excess fabric bunching. Correct fit prevents the tabi from slipping inside zori sandals, which causes visible misalignment and discomfort.
Traditional Footwear: Zori vs. Geta
Two types of sandals dominate traditional Japanese clothing: zori for formal wear and geta for casual occasions.
-
Zori: Formal sandals with relatively flat soles covered in microfiber, leather, or brocade fabric. Zori are traditional sandals worn for formal occasions with tabi-standard for tea ceremony, graduations, weddings, and any event requiring a formal kimono. Heel height varies; higher heels signal greater formality.
-
Geta: Geta are elevated wooden clogs primarily worn with casual yukata, often at summer festivals. They typically have two raised "teeth" on the bottom and are frequently worn without tabi in warm weather, though some wearers add tabi in cooler months.
-
Coordination basics:
-
Formal kimono → zori + white tabi
-
Casual yukata → geta, often barefoot or with fun tabi
-
Men's kimono and hakama → zori for formal, geta for casual
-
-
Comfort advice: Traditional Japanese sandals are slightly shorter than the foot-the heel naturally extends about 1 cm past the back edge. Adjust the hanao (thong strap) for a snug but non-rubbing fit. Breaking in new hanao before a long event prevents blisters.
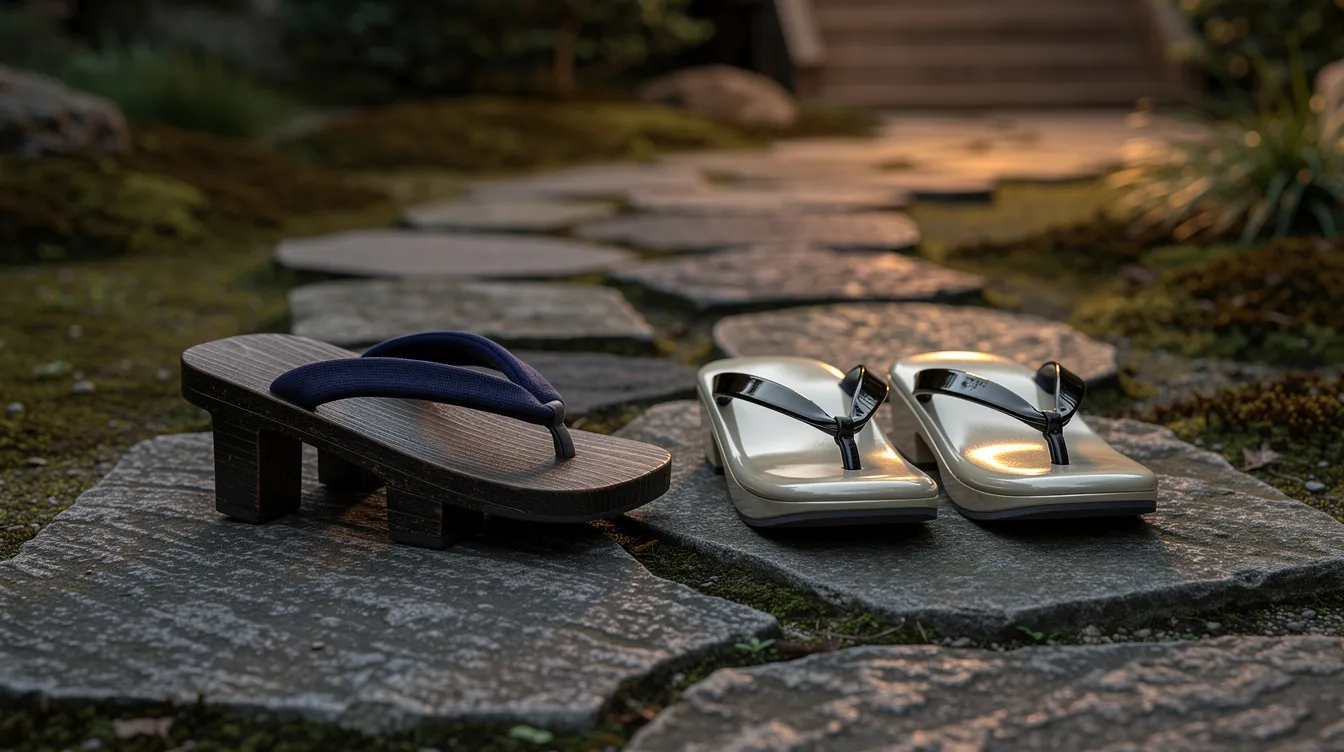
Kimono Clips and Small Tools That Make Dressing Easier
Beyond the major accessories, several small tools can make solo kimono dressing dramatically less frustrating.
-
Kimono clips: Padded, spring-loaded clips used during dressing to temporarily hold layers and collars in place. Clip the back collar to keep it centered, hold the ohashori fold while tying koshihimo, or pin the obi front while adjusting the back.
-
Eri-shin (collar stiffeners): Eri-shin are collar stiffeners that maintain the collar's shape-thin plastic strips inserted into the nagajuban collar to keep it crisp and smooth around the neck.
-
Garment brushes and bags: A soft brush removes surface dust from silk after wear. Breathable garment bags (not plastic) protect stored kimono and accessories from humidity and insects.
-
Kanzashi (hair ornaments): Kanzashi are traditional hair ornaments worn in updo hairstyles to complete the look. Kanzashi motifs often reflect seasonal changes and occasions-cherry blossoms for spring, chrysanthemums for autumn.
These tools aren't strictly required to wear a kimono, but they dramatically reduce frustration for beginners practicing alone, turning a complicated process into a manageable routine.
Under Kimono vs. Modern Undergarments: What's Acceptable?
One of the most common questions from newcomers is whether they need specialized underwear or can use what they already own.
-
Traditional layering order: Modern underwear → hadajuban → nagajuban → outer kimono. This sequence hasn't changed fundamentally in centuries.
-
Casual practice: A sports bra (or kimono bra that flattens and smooths the bust), seamless briefs, and a simple camisole as hadajuban substitute work perfectly when learning at home.
-
Formal events: Visible modern straps, lace edges, or bright-colored underwear beneath a Japanese kimono are discouraged for ceremonies and professional photos. Smooth, flesh-toned or white undergarments are safest.
-
Climate-specific tips:
-
Humid summer: lightweight, moisture-wicking layers under your clothing prevent overheating
-
Cold winter: thin thermal layers add warmth without adding bulk under the kimono's cylindrical silhouette
-
-
Bottom line: Start with what you own, then gradually invest in proper under kimono items as you progress. Nobody needs a complete specialist wardrobe on day one.
Step-by-Step Overview: How to Wear a Kimono with These Accessories
Here's a high-level roadmap for wearing kimono using the accessories covered above. This isn't a detailed tying tutorial-it's a mental checklist to build your routine.
-
Put on tabi socks first. Bending down later in full layers disrupts your carefully arranged kimono.
-
Layer hadajuban and hosei padding. Put on your skin-layer undergarment, then wrap towels or pads at the waist and lower back. Secure with a koshihimo.
-
Wear nagajuban. Wrap the nagajuban with the left side over the right side. The nagajuban should be centered with a fist-sized gap at the collar (back of the neck). Secure with a koshihimo at the chest and smooth with a datejime.
-
Put on the outer kimono. Adjust the length so the hem hits the ankle. Fold excess length into the ohashori (waist fold) to manage any excess fabric. Tie the kimono with a koshihimo at the belly button. Set the collar: the kimono collar should show 1–2 cm of the nagajuban han-eri.
-
Secure collars with a Korin belt. Clip and wrap to lock the V-shaped neckline in place.
-
Wrap the obi. Place the obi-ita against your front body. Wrap the obi around your waist, position the obi makura for your chosen knot, and tie the musubi.
-
Finish with obiage and obijime. Drape the obiage over the obi makura and tuck it into the obi top. Tie the obijime through the knot and across the front. Do a final mirror check: back seam straight, hem even, collar clean.
Remember to wrap the left side of the kimono over the right side-right-over-left is reserved for dressing the deceased in Japanese culture. Mastering this flow takes practice, but it soon becomes as intuitive as tying a necktie.
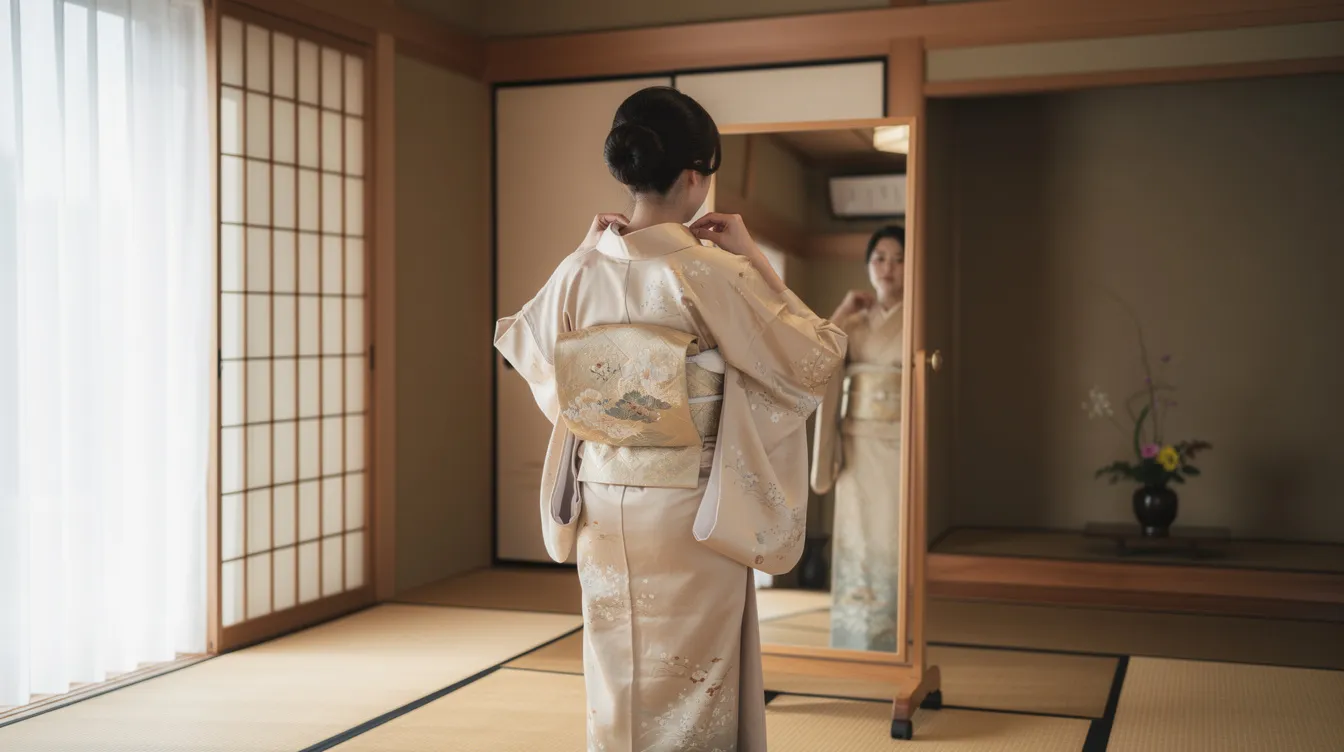
Casual Yukata vs. Formal Japanese Kimono: Accessory Differences
Understanding the gap between a yukata outfit and a formal kimono outfit helps you plan purchases and manage expectations.
Typical yukata accessories:
-
Basic underwear or light hadajuban substitute
-
2–3 koshihimo
-
Optional light datejime
-
Hanhaba obi (no obi makura or obiage needed)
-
Optional simple obi-ita
-
Geta sandals, often without tabi in summer
Typical formal kimono accessories (tea ceremony, weddings, graduations):
-
Hadajuban and nagajuban (silk or quality polyester)
-
Hosei padding
-
3+ koshihimo
-
2 datejime
-
Korin belt
-
Obi-ita
-
Obi makura
-
Obiage and obijime
-
White tabi
-
Formal zori
A yukata is an unlined cotton summer garment that skips the nagajuban, heavy padding, and most of the finishing accessories. A formal kimono for events requires the full layering system with careful attention to color coordination and seasonal appropriateness.
Recommendation: Start with a yukata set to learn the fundamentals of wrapping, tying, and obi technique. Once comfortable, add pieces incrementally as you transition to full kimono dressing. You don't need to buy everything at once.
Tea Ceremony and Other Formal Occasions: Accessory Etiquette
Formal settings like tea ceremony, graduations, and weddings have stricter expectations for how accessories are selected and worn.
-
Color restraint: For tea ceremony, subtle, muted colors in obiage and obijime are preferred over bold patterns. The calm aesthetic of the tea room takes priority over personal flair. Avoid large or flashy obidome.
-
Collar perfection: A crisp, clean nagajuban collar with a smooth white han-eri is non-negotiable. Wrinkled or crooked collars signal carelessness in these contexts.
-
White tabi only: White tabi are expected without exception for tea ceremony and most formal events. Patterned or colored tabi are reserved for casual settings.
-
Obi lines: The obi front should be perfectly flat (thanks to your obi-ita), and the back knot neatly shaped and centered. Formal styles demand consistency.
-
Footwear: Refined zori in neutral tones pair with formal kimono. Avoid geta at formal events.
-
Furisode for unmarried women: At weddings and coming-of-age ceremonies, unmarried women often wear furisode-kimono with long sleeves-paired with elaborate fukuro obi and refined accessories.
-
Geisha and professional settings: In Japan, professional kimono wearers like geisha follow even more elaborate accessory conventions, but those rules go beyond everyday formal wear.
The key principle: when in doubt, err on the side of simplicity and subtlety. Formal occasions reward restraint and precision over showiness.
Caring for Your Kimono Accessories
Proper care extends the life of your accessories by years-and some of these items can last decades with attention.
-
Koshihimo and hadajuban: Hand-wash or gentle machine wash in cotton-safe detergent. Air dry flat. Fold neatly for storage.
-
Datejime: Wipe down after wear. Fabric versions can be hand-washed; foam-core types should be spot-cleaned only.
-
Obi-ita and obi makura: Wipe with a damp cloth. Avoid submerging in water, as internal structure can warp. Air out after each wearing.
-
Obijime: Roll loosely-never fold tightly, which can crease or kink the cord. Store in a breathable pouch.
-
Obiage: Iron gently on low heat through a pressing cloth if wrinkled. Roll rather than fold for storage to preserve shibori texture.
-
Nagajuban and outer kimono: Air out on a kimono hanger (iko) for at least half a day after wear. Store in breathable garment bags-never sealed plastic, which traps moisture and encourages mold.
-
Tabi: Machine wash in a mesh bag. Replace when they lose their crisp whiteness or the kohaze hooks loosen.
-
Elastic items (Korin belt, obi-ita straps): Inspect yearly. Elastic loses tension over time-if clips slip or bands feel loose, replace them.
Building Your First Kimono Accessory Set: Practical Shopping Tips
You don't need a warehouse of accessories to start learning. Here's a practical minimal starter kit:
Starter kit for home practice:
-
Hadajuban (or smooth substitute like a camisole + slip)
-
Nagajuban (washable polyester recommended)
-
3 koshihimo (cotton, medium width)
-
1 datejime (hook-and-loop closure for ease)
-
1 Korin belt
-
1 obi-ita (belt-type with elastic)
-
1 hanhaba obi
-
1 pair white tabi socks
-
1 pair zori or geta (depending on your first outing-casual festival or formal event)
As you progress, add:
-
Obi makura (when you're ready for taiko knots with Nagoya obi)
-
Obiage and obijime set (one simple, versatile combination)
-
Hosei padding or dedicated pads
-
A second datejime
Shopping principles:
-
Prioritize structure over decoration. Under layers and structural accessories (koshihimo, datejime, Korin belt) come before investing in multiple decorative cords or luxury obi.
-
Choose neutral, versatile colors for early purchases-white or ivory under layers, pale obiage, muted obijime-so they mix and match with several kimono.
-
Consider pre-assembled kitsuke sets, but check contents carefully. Some budget sets skip essentials like koshihimo or obi-ita while including items you won't need immediately.
-
Quality over quantity. One well-made Nagoya obi that you can tie confidently is worth more than three cheap obi collecting dust.
The world of Japanese culture and kimono clothing runs deep, and building your collection is part of the journey. You don't need every possible tool to start learning how to dress in a kimono. A thoughtful starter set, some patience, and a mirror are enough to begin. Start with a yukata, master the basics, and build your collection one piece at a time.