

Introduction: From “Kimono Struggle” to Effortless Authenticity
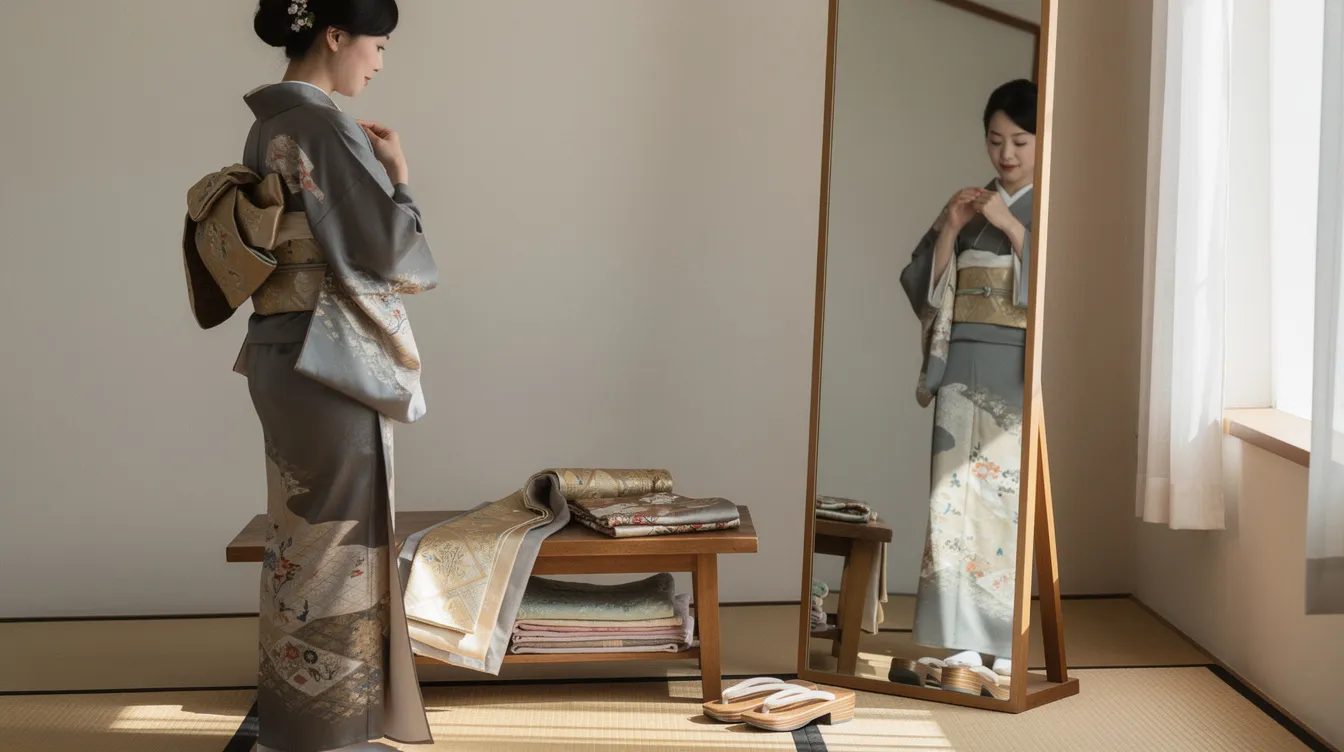
Imagine getting ready for a tea ceremony in 2026, standing in front of a mirror abroad with a formal kimono, three browser tabs open, and a pile of layers you cannot quite name. The robe is beautiful. The rules feel intimidating. The obi looks like an art project with consequences.
A kimono, which translates to “thing to wear,” is a traditional Japanese garment and the national dress of Japan, characterized by its wrapped-front design and square sleeves. Today, a kimono is most often used as formal wear for weddings, graduations, tea ceremonies, funerals, and cultural events, while the yukata is the more common casual summer version seen at festivals.
The hard part is kitsuke, the way a person wears their kimono through specific techniques for dressing and styling the garment. Even after learning strictly for 3 months, many beginners can still end up in a mess when wearing kimono or trying to manage an obi. ADN Kimono’s approach is simple: Effortless Authenticity. We keep the traditional shape, collar line, and silhouette, but use modern construction, cotton layers, interchangeable collars, and a pre-tied obi so you can learn how to wear obi correctly in about 5 minutes instead of years of practice.
Understanding the Basic Kimono Components
Before you learn how to wear kimono, it helps to know what each piece does. Imagine a long T-shaped robe that reaches the ankles, with a crisp collar at the neck, straight sleeves, and a wide belt at the waist. The final outfit should look calm, vertical, and intentional rather than bulky.
Here are the basic visible components:
- Kimono: the main outer garment, wrapped around the body and secured at the waist.
- Obi: the broad sash that holds the look together; the kimono is traditionally worn with a broad sash called an obi, and is commonly accessorized with zōri sandals and tabi socks.
- Obiage: a soft scarf-like piece that covers part of the obi support and adds colour.
- Obijime: a decorative cord tied across the obi for security and finish.
- Tabi socks: split-toe socks worn with traditional footwear.
- Zōri sandals: formal sandals that complete the silhouette.
Traditional kitsuke also relies on many other items, including koshi-himo ties, datejime belts, towels, padding, obi-ita, obi-makura, and sometimes clips or a temporary pin. Koshi-himo are thin sash ties used to secure different layers of a kimono, typically requiring multiple pieces. Padding may be used around the waist to create a flatter, cylindrical silhouette, which is considered the beauty standard for kimono. ADN Kimono’s system reduces how many of these accessories you need, especially when using a cotton nagajuban and pre-tied obi.
Important rule: always wear the kimono left side over right. Kimonos are typically worn left side over right, except in the case of the deceased, who are dressed right side over left. For living people, left over right is not optional. Right over left is funeral dressing.
There are different types of kimono for men, women, and children, varying based on the occasion, the season, and the wearer’s age. Women’s styles usually have more volume, a more defined waist, and more visible layering. Men’s styles are straighter, with shorter sleeves and a lower, simpler obi. Sleeve length also matters: longer sleeves are associated with youthful or highly formal women’s styles, while shorter sleeve designs create a more restrained formal shape.
A women’s kimono may require an ohashori fold at the waist because the garment is often made longer than the body. Men’s kimono are usually cut closer to the same length needed for wearing and do not create the same waist fold. The shoulder seam, sleeve drop, collar edge, and hem all affect how formal and balanced the outfit appears.
Kimono history is also part of why these rules matter. The earliest kimono-like garments in Japan were influenced by traditional Chinese clothing introduced during the Kofun period (300–538 CE), leading to the adoption of Chinese styles by the Imperial Japanese court. During the Edo period (1603–1867), the kimono evolved significantly, with the rise of the merchant class leading to luxurious displays of wealth and the development of various styles and fabrics, including the use of damask fabric known as rinzu.
The kimono’s design and formality have also been influenced by historical sumptuary laws, which restricted the use of certain colors and patterns based on social class, a practice that shaped the aesthetics of kimono throughout history. This is one reason details such as pattern placement, woven texture, dyeing method, sleeve length, and obi choice still carry meaning in japanese culture.
The Hidden Foundation: Modern Nagajuban with Interchangeable Han‑eri
One of the least glamorous problems in wearing kimono is cleaning the layer that touches sweat, sunscreen, foundation, and perfume. Traditional silk undergarments can be difficult to wash, especially outside Japan where specialist cleaners are rare. A beautiful collar can stain quickly, and repeated dry cleaning of delicate fabric is expensive and stressful.
The nagajuban (長襦袢) is a long undergarment worn under a kimono, typically made of lightweight materials and designed to be seen only at the collar and sleeve edges. It is not lingerie. It is a structural base that protects the outer kimono, supports the collar, and helps the garment move correctly. A juban is worn underneath the main robe, and a half juban or half length version may be used for lighter or more casual wear.
Base layers for wearing a kimono include tabi, hadajuban, and susoyoke. Hadajuban (肌襦袢) is another type of undergarment worn under the nagajuban, consisting of a wrap-front top and a skirt, and is often made from breathable fabrics like cotton or linen. The susoyoke is the lower skirt-like layer that helps protect the kimono from the body. Traditionally, kimono undergarments were often brightly colored or patterned to comply with historical sumptuary laws that restricted the visibility of elaborate designs on outer garments.
ADN Kimono’s 100% cotton nagajuban is made for modern life. The cotton material is breathable, washable, and easier to care for than silk. It is cut slightly narrower and shorter than the outer kimono, so the underlayer does not bunch up under the full length robe. This narrow width is intentional: the base supports the shape without adding unnecessary bulk.
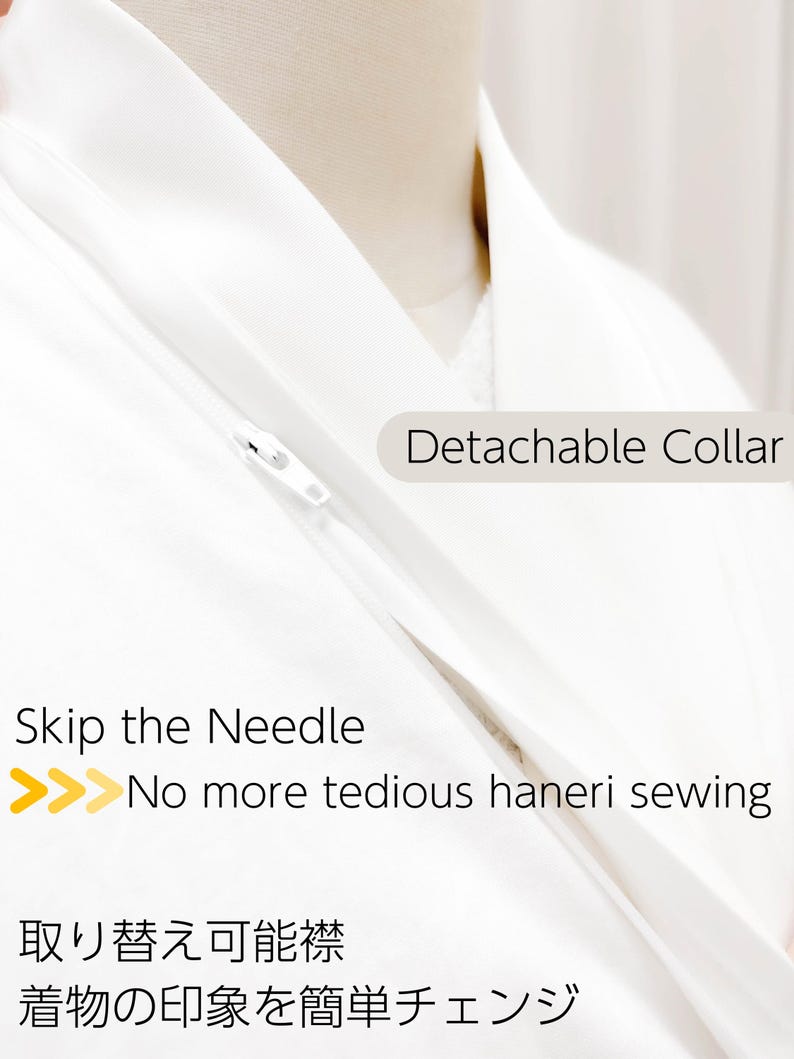
The key detail is the interchangeable han-eri system. The han-eri is the decorative collar attached to the nagajuban and visible at the neck. Instead of treating the collar as permanent, ADN Kimono uses a “switch & sew” method: the decorative collar is sewn onto a plain cotton base with simple stitches, then removed and replaced when you want a new style. You can change the collar without buying a new undergarment.
Choose your han-eri like this:
- White: best for weddings, ceremonies, and highly formal occasions.
- Off-white or pale pastel: ideal for tea ceremony, graduations, and refined formal wear.
- Colored or patterned: useful for festivals, creative styling, or a modern kimono look.
- Bright colours: best used when the rest of the outfit is simple, such as with a vintage kimono or plain komon.
This system improves hygiene and sustainability at the same time. You wash the cotton base frequently, spot-clean or replace the collar when needed, and avoid repeatedly cleaning the outer silk garment. Over time, the washable underlayer helps protect delicate robes, reduces waste, and makes it easier to enjoy your own kimono without needing professional help after every event.
Perfecting the Silhouette: Pre‑tied Obi (Tsuke‑obi) vs. Traditional Obi
The obi knot, or musubi, is famously the hardest part of kimono dressing. A beginner using a full length obi can spend 20–30 minutes or more trying to fold, tie, tighten, and center the shape. One uneven pull can make the back look twisted, and a sloppy bow can ruin an otherwise elegant outfit.
A traditional obi is a long, wide sash, often around 4 meters of fabric, folded full width or half width depending on style and tied into decorative knots such as otaiko or fukurasuzume. An obi is a wide decorative sash used to secure the kimono, with several components including obi-ita, obi-makura, obiage, and obijime. Accessories and the style of the obi can significantly affect the formality of the kimono outfit, with different types of obi and their knots indicating varying levels of formality.
A nagoya obi is a common semi-formal choice because part of the fabric is pre-folded to make tying easier, while more formal obi belts may be stiffer, heavier, and more elaborate. Even then, symmetry matters. The knot must sit in the center of the back, the obi edge should be clean, and the tension should support the body without crushing the waist.
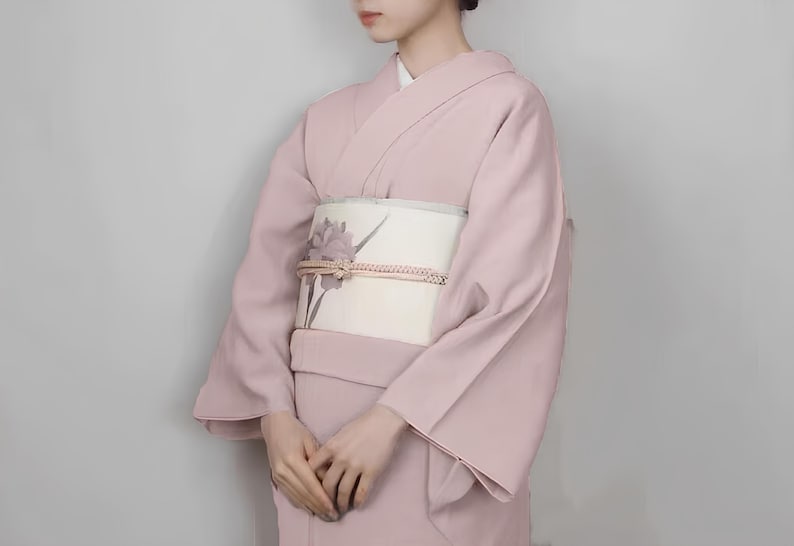
ADN Kimono’s pre-tied obi, also called tsuke-obi, solves the most difficult part. It is a two-part system: one belt section wraps around the waist, and a fully shaped bow or drum knot is attached separately. High-quality pre-tied obis are visually indistinguishable from hand-tied ones in photos and in person, especially when the knot is placed at the correct height.
This matters for busy, global users. Picture a first-time wearer getting ready alone before a 2026 university graduation ceremony in London. With a traditional obi, they might spend half an hour wrestling with extra fabric. With a tsuke-obi, they can secure the belt, attach the bow, check the center line, and leave with a clean, professional look.
The main benefits are simple:
- Consistent shape: the bow or drum knot is already formed.
- Faster dressing: the obi can be secured in under 3 minutes.
- Less strain: there is less fabric to pull around the shoulders and back.
- Better confidence: the final outfit looks prepared, not improvised.
- More flexibility: one kimono can be restyled with different obi and collar combinations.
This is not about removing tradition. It is about removing unnecessary friction so more people can wear kimono respectfully and comfortably.
If you want a detailed guide and more information about Tsuke Obi, please visit our article: Pre-Tied Obi (Tsuke Obi): Make Kimono Wearing Truly Easy
Step‑by‑Step: How to Wear a Kimono in About 5 Minutes
This walkthrough is designed for someone standing in front of a full length mirror. Using a full-length mirror is important for checking the evenness of the hem and the smoothness of the back when dressing in a kimono. Keep the mirror nearby, move slowly, and check the front, side, and back after each major step.
Step 1 – Prepare and put on the base layer
Start with smooth underwear. Many women prefer a sports bra or kimono bra because a flatter front helps create the traditional cylindrical line. Seamless underwear is best because raised seams can show through the fabric.
Slip into the hadajuban if you are using one, then put on the cotton nagajuban. Center the back seam along your spine. The collar should form a neat V at the base of the throat, not a deep neckline. The positioning of the collar is essential, with a gap of about one-and-a-half fists’ width typically left at the back for women. For a beginner, begin with a smaller gap and adjust once the shape feels secure.
Make sure the fresh han-eri edge is visible. The han-eri should look crisp and clean because it frames the face and protects the outer collar from makeup and sweat.
Step 2 – Put on the kimono
Pick up the kimono and slide your arms through the sleeves. Align the center back seam with your spine, then lift the hem so it just skims the ankles. The hem should not drag, and it should not sit so high that the ankle line looks broken.
Now close the robe with the correct orientation. Bring the right side across your body first. Then bring the left side over the right. Remember: left over right for the living. Another way to say it: when you look down, the left panel should be on top.
For women’s kimono, adjusting the length of a kimono involves creating a fold called the ohashori by pulling the excess fabric up at the waist. Smooth the extra fabric into a flat horizontal fold. This ohashori should look even from the front and should not bulge at the side seams.
Step 3 – Secure the body of the kimono
Use one or two koshi-himo or a soft belt to hold the garment closed. The first tie usually sits around the waist or slightly above the hip. Keep the front edges vertical and parallel. If the collar shifts, reset it before adding more pressure.
Smooth the fabric from the center front toward the side seams. Then smooth the back down from the shoulders toward the waist. The goal is a straight, column-like shape, not a fitted hourglass. Traditional kitsuke often uses towels or padding to even out the body, but ADN Kimono’s simplified layering helps create the shape without requiring a full classroom kit.
Check the sleeve on each side. The sleeves should hang evenly, and the sleeve opening should not twist. If one sleeve looks longer, check whether the shoulder seam or inner juban has shifted.
Step 4 – Attach the pre‑tied obi
Wrap the obi belt portion snugly around the waist. For women, it usually sits slightly above the hip bone or near the natural waist depending on the style. For men, the obi is worn lower, closer to the hips.
Fasten the belt securely at the front, then rotate or arrange the attachment point so the knot can sit at the center back. Attach the pre-tied bow or drum knot module. Position it at roughly the height of the lower ribs for women, and check in the mirror for symmetry.
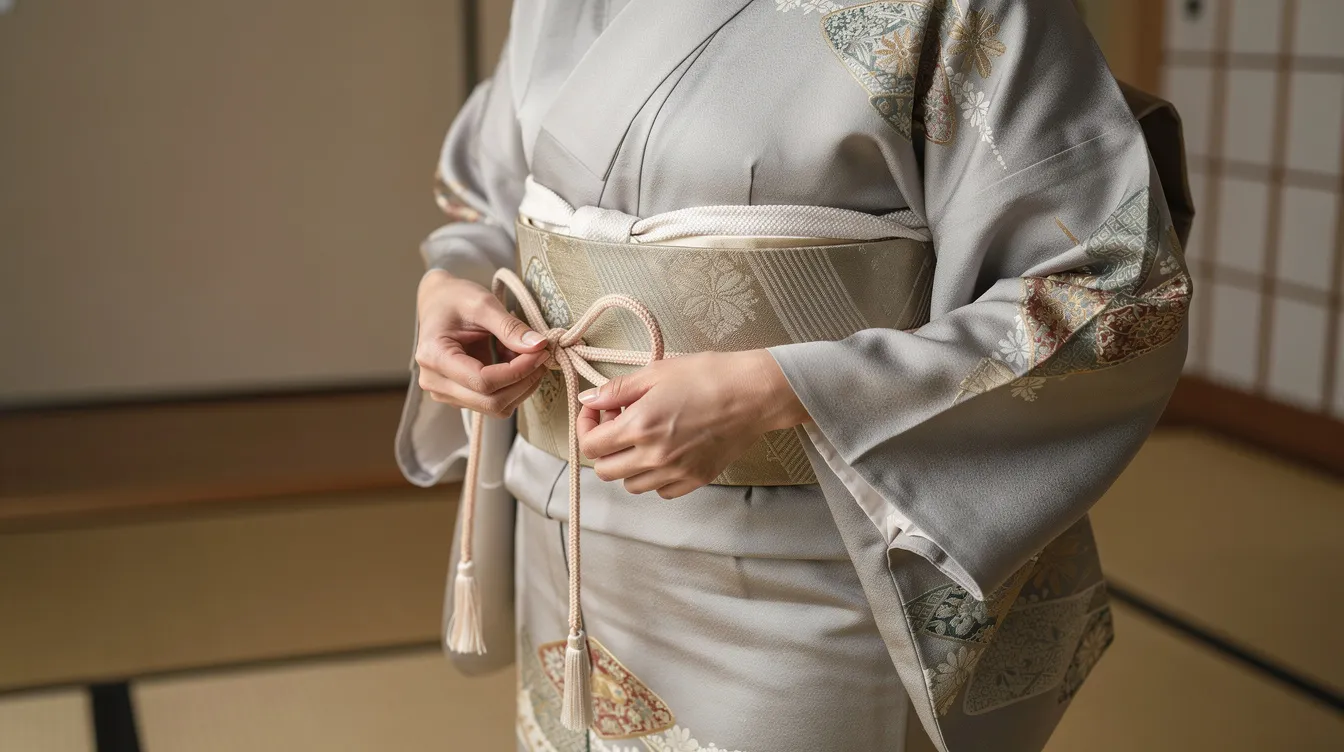
The knot should not lean. The top edge of the obi should look level. If your obi includes obiage and obijime, arrange the obiage so it softens the top line and tie the obijime across the center for security.
Step 5 – Final touches
Straighten the collar so only the fresh han-eri edge is visible. Check that the kimono collar and juban collar run in clean, parallel lines. Adjust the sleeves so both sides hang evenly.
Put on tabi socks and zōri sandals last. Once dressed, walk with small, inward-toed steps. When wearing a kimono, it is important to take small, inward-toed steps and avoid raising your elbows too high to maintain the silhouette. When sitting in formal settings while wearing a kimono, it is advised to avoid leaning back in chairs to prevent crushing the obi knot.
Your first attempt may not look like a professional dresser’s work. That is normal. The important point is that the ADN system removes about 90% of the traditional difficulty: the washable collar base handles the hidden foundation, and the pre-tied obi handles the hardest visible structure.
Choosing the Right Kimono and Obi for Different Occasions
Not all kimono are equal. In 2026, you might wear one for a friend’s wedding in Tokyo, a university graduation in London, a tea ceremony in Paris, or a summer festival in Los Angeles. The right choice depends on formality, age, season, material, and styling.
Kimonos are classified not only by formality but also by factors such as weaving structure, fiber material, and dyeing method. Formal kimonos are typically made from silk, while informal varieties may be made from cotton or synthetic fibers. Modern kimonos are available in a variety of fabrics, including easier-to-care-for materials like polyester, in addition to traditional silk. These new fabrics make kimono more accessible for travel, humid climates, and frequent wear.
For women, a furisode has longer sleeves and is used for very formal events, especially by unmarried women. A Tomesode is a type of formal kimono that features patterns only from the waist down to the hem. A homongi is suitable for visits and ceremonies, while a komon has an all-over pattern and works well for semi-formal outings. A yukata is the most informal type of kimono, commonly worn at summer festivals. For a more casual or summer look, a yukata can be worn, which does not require as many undergarments as a traditional kimono.
In the modern era, kimonos are primarily worn during formal occasions such as weddings and funerals, with the yukata, a casual summer kimono, being more commonly worn at festivals. For a wedding, choose a more formal kimono and a glossy obi with metallic woven detail. For daytime events, a simpler woven obi can feel elegant without being too heavy. For casual wear, lighter cotton or synthetic options are easier to manage.
For a detailed guide on how to wear a yukata, please check out our article: Yukata: Your Ultimate Guide to Stylish Summer Festival Dressing in Japan.
Season also matters. Spring works beautifully with soft pastels, sakura motifs, ivory, pale pink, or gentle purple. Summer suits cool blue, water patterns, cotton yukata, and breathable layers. Autumn invites deep reds, browns, golds, and maple designs. Winter ceremonies often call for subdued, elegant tones and lined garments with a richer material feel.
You can also style a vintage kimono carefully with modern support pieces. A vintage piece may have a shorter length, a narrow shoulder width, or a smaller sleeve opening than a modern body expects. A modern kimono may be easier to size, easier to washed safely depending on fabric, and more consistent in construction. Neither is better by default; the point is choosing the garment that fits the event and your comfort.
It is worth noting that geisha and maiko dressing is its own specialist art and should not be used as the basic model for beginners. Their collars, hair, sleeve proportions, walking style, and layered robes are highly specific. For most wearers, the goal is not performance costume. It is a respectful, wearable outfit for a real occasion.
ADN Kimono’s interchangeable collars and pre-tied obi allow users to restyle a single base kimono for multiple events just by changing accessories. One clean base, several han-eri options, and a few obi choices can create different looks without needing a completely new wardrobe.
Caring for Your Kimono and Undergarments
Many readers live far from Japanese dry cleaners or textile specialists. That makes home care important. The easiest way to protect the outer kimono is to keep the layers worn underneath clean, breathable, and easy to maintain.
ADN Kimono’s 100% cotton nagajuban can be machine washed on a gentle cycle with mild detergent and cool water. Line dry it rather than tumble drying to preserve shape and reduce environmental impact. Because the collar is removable, you can spot-clean the han-eri with mild soap or replace a stained collar completely instead of risking damage to the outer kimono.
For the outer kimono, fold along the existing seams and store it flat in a breathable garment bag or drawer. Avoid direct sunlight, damp rooms, and heavy compression. Air the garment occasionally on a dry day, especially after formal events or travel.
Quick care guide:
- Do wash cotton base layers regularly.
- Do remove or spot-clean han-eri when makeup or sunscreen marks appear.
- Do fold the kimono along its original seam lines.
- Avoid tumble drying structured cotton layers.
- Avoid spraying perfume directly on silk or delicate material.
- Avoid storing kimono in plastic in humid conditions.
Consistent care of washable underlayers significantly extends the life of more delicate silk or high-end fabrics. This makes the overall wardrobe more sustainable, more affordable, and easier to enjoy over years rather than only once.
Honoring Tradition Through Accessibility: ADN Kimono’s Perspective
Learning how to wear kimono should be about the joy of japanese culture, not the stress of fighting fabric in front of a mirror. The cotton nagajuban with interchangeable han-eri solves the hygiene and collar problem. The pre-tied obi solves the musubi problem. Together, they make wearing kimono realistic for beginners worldwide in 2026.
Respecting tradition does not mean keeping kimono difficult. It means preserving the line, shape, proportion, and feeling of the garment while making it comfortable for modern bodies, schedules, and climates. A kimono is not only a museum piece. It can be worn to weddings, anniversaries, graduations, tea ceremonies, formal dinners, and meaningful personal moments.
If you are ready to start your own kimono journey, explore the AnotherDateNight (ADN) collection from ADN Kimono. Begin with the washable cotton nagajuban base, choose interchangeable han-eri styles, and add a pre-tied obi for a clean, confident look from your first dressing session.